Download Magic Workstation
Go to www.MagicWorkstation.com and browse to the Download-section. Click on the Magic Workstation Complete Download and also any Game Packs you would like to use. Save both files somewhere on your computer. Once they’re downloaded, you open the Complete Setup file first, and the Setup starts. Do not install the Game Packs until after MWS is installed.
You accept the agreement and click Next. Then you get a window to browse to where you’d like to have Magic Workstation (MWS) installed. C:\Program Files\Magic Workstation is advised, or on any other hard drive where you have more free space, like on ‘D:\’. Then you can choose to create Icons to be able to start MWS easily. So if you intend to play it much (recommended ) then select one icon-option or both.
Now you’ll see a bar where the progress of the installation is being tracked. If it’s done you can Finish the setup and check the option to LAUNCH Magic Workstation!
Getting Started
Again you’ll get a bar, which tracks the loading progress and then you’ll get a window that asks you to order a Registered copy, just wait a bit and you can click on the OK-button to advance without ordering. You’ll get a random tip (advice) of how to use one of the many sophisticated options that MWS is rich of; just close it and now this window will appear:
Deck Editor
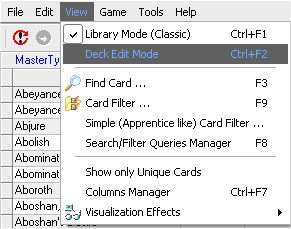
You see a lot of options and I won’t describe them all here, but nothing much can go wrong with trying them. I’ll just give you the information you need to build a deck and later on about how to play. First switch to Deck Edit mode. You click on View and then on Deck Edit Mode, like you can see on the picture here at the left. It’ll be much better for building a deck fast and conveniently.
The following window will appear:
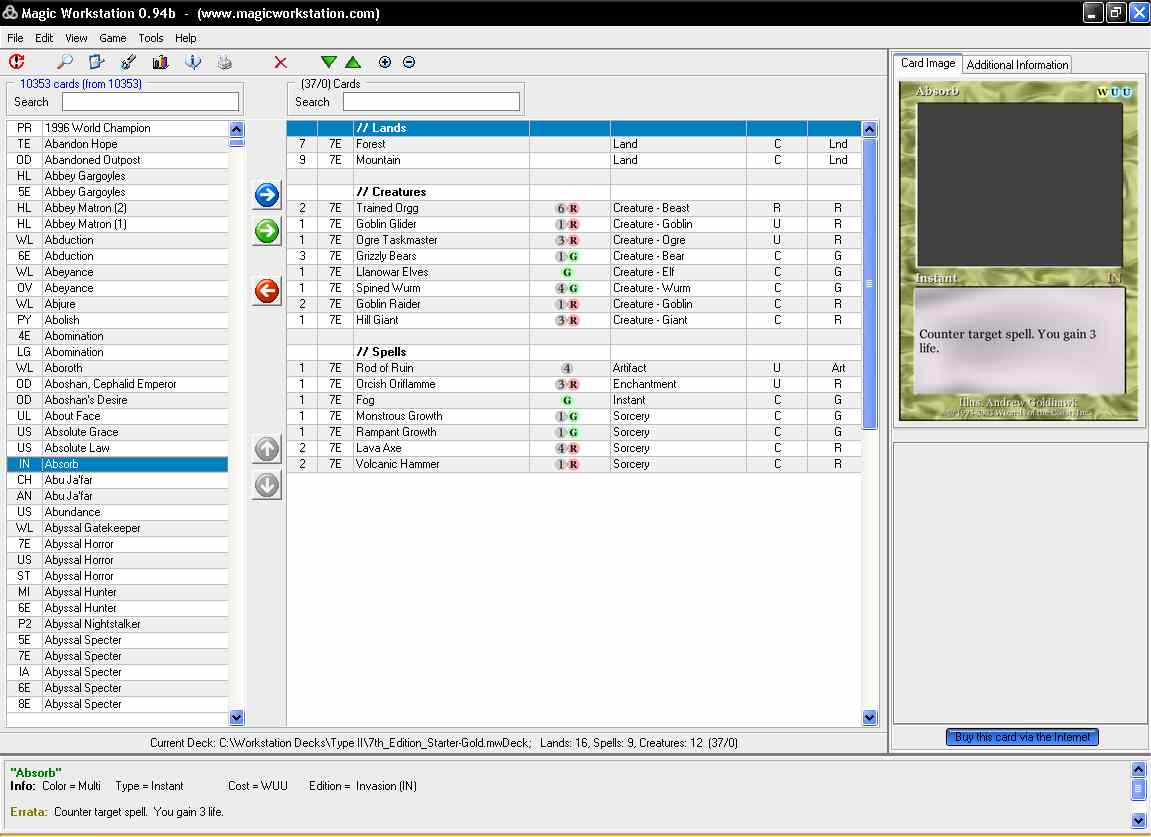
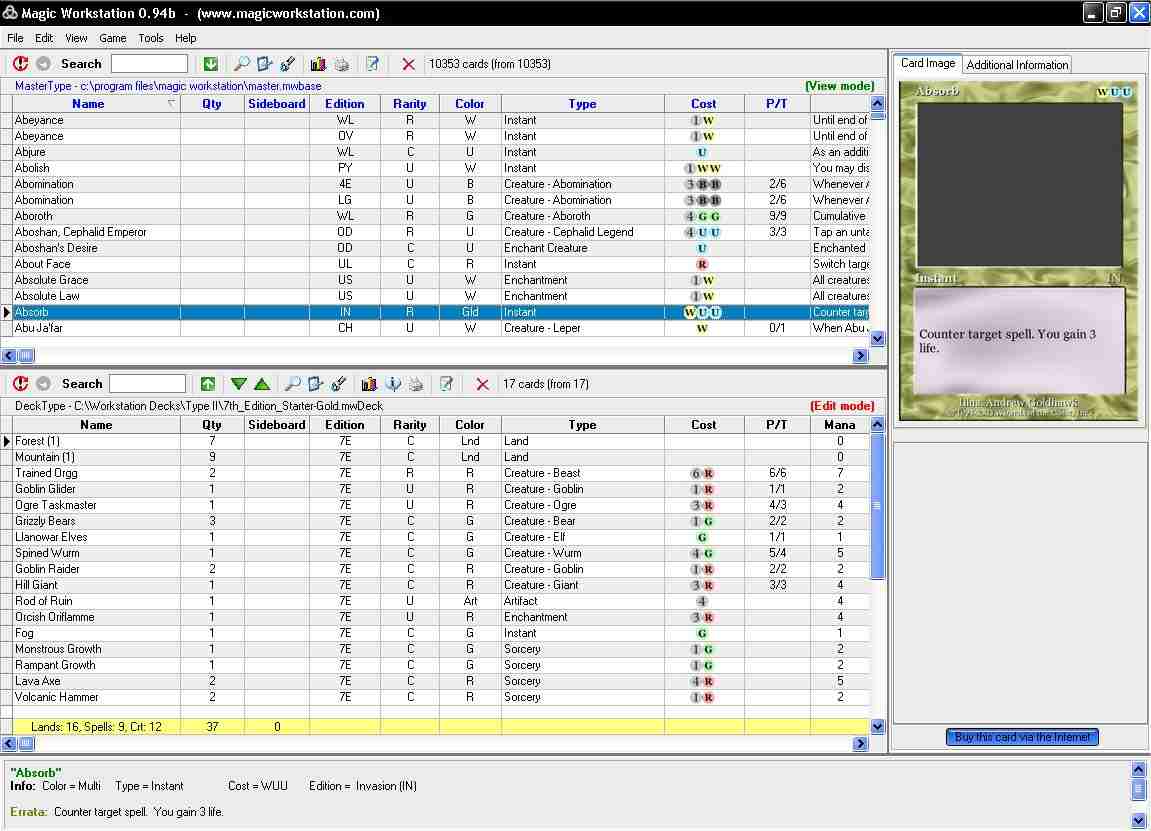
At the left you see the Master Database, which has all Magic cards. At the right you see a deck that comes standard with Magic Workstation.
Important Deck Editor Icons (Deck Edit Mode)
The most important icons you see are the ones in the middle between the 2 card lists:
The Blue Arrow-Icon adds one copy of a card you select from the left Master Database to the Main Deck.
The Green Arrow-Icon adds one copy of a card you select from the Master Databse to your Sideboard.
The Red Arrow-Icon deletes cards from your deck.
You can use the left Search box to find a card more easily, by typing the first couple of letters of the card.
Create decks and save them

Go to File and then New Deck, like you can see in the picture here at the left. You can now choose the name of your deck and save it. Then you can start building your deck, with the aforementioned arrows to move cards in and out of your deck. Once it’s done, you do File -> Save Deck. You need to have clicked on one card of your deck before this, otherwise it might just save the database on the left, which isn’t needed at all. It will save the ‘active window’ and a simple click on a card of your deck before you save will make it the ‘active window’.
As you can see in the File menu, there’s also an option to open a previously saved deck, and then edit it and save it. This last mentioned saving is done with the ‘Save Deck/Library As’ option. You can give the deck a new name and you’ll have the older and newer version both saved. Remember to have your deck as the ‘active window’.
The best place to save decks is inside the \Decks folder a.k.a. directory. All the World Champion Decks and Preconstructed Decks are there already for you. If you plan on building a lot of decks, you can choose to make new folders a.k.a. directories: \T1, \T2 and \Extended . And then what I usually do, when a new set comes out, is moving the older T2 decks to a folder inside T2Decks named: \BeforeLegions.